Thursday, September 18, 2014

Get Notability App by Enrolling into Managed Distribution

Getting yourself enrolled into Managed Distribution will enable your institution (in our case, Columbia Public Schools) to distribute apps and books to your devices. It's a fairly easy process, assuming Apple doesn't make any changes. We think that iOS8 coming online has caused a new step in the process. This is the latest set of instructions for getting enrolled.

First, you need to request an invitation. Talk to your media specialist about getting the school invited. When that occurs, you'll receive an email from "External Company". I know it sounds like spam, but it's not.

Open the email on your school device. Do not do it on a computer or anywhere else. Just on your school iPad. Here's what the email looks like:

Click on the link that says "Sign In". You'll be sent to the Safari app. This is where you will sign in to the server. It requires your active directory username and password.


At this point, you'll be moved into the App Store. I first received a popup with terms and conditions. Agree to all that if you want. If you don't, you're stuck. Now you'll sign in with your Apple ID and password. When successful, you'll get a message saying that your organization can now assign apps to you. Sorry, mine was already complete so I couldn't get a screenshot. 

Once complete, you should receive the Notability app right away. If your apps are set to auto download, it should appear immediately. If not, it will be in your purchased history for you to add manually. Through this process, you are more than welcome to put assigned apps on up to five personal devices.

Tuesday, September 16, 2014

Use Albums in Photos App to organize student work

Here's a great tip from Leanna Guillory (@mrsguillory3rd). She's been using iPads in her room for about a year, but this is her first year for a full 1:1 environment. Her classroom, like most, hurts for wall space. Her students use chart paper all the time to document learning in the classroom. However, it was always a challenge to figure out which charts to leave up and which to remove. But with devices, it was a problem no more.

Leanna decided to use the Photo albums to her advantage. She had students create albums for different subjects, take pictures of the charts, and then organize into those albums. Then the old charts can be removed and replaced with new ones. Simple idea, but pretty smart. 

Here's a quick video to show you how to create an album and organize your pictures: 


Wednesday, September 10, 2014

Tips for using Today's Meet in the classroom

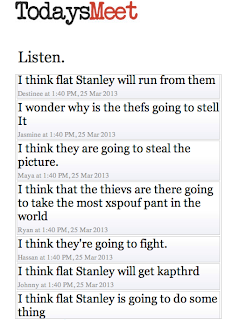
As more and more iPads are getting deployed to classrooms, teachers are looking for easy ways to get started with their devices. One thing we've discussed in the past is Today's Meet. Basically, Today's Meet is a website that allows you to add to a comment stream. The fancy term is a "backchannel". I got to be at Parkade today with fifth grade classrooms as they got started on this process. Here are some tips to get you started.

Making a Today's Meet board is simple enough. Visit Today's Meet on your favorite browser. You'll be immediately asked to create your board. Now you can sign in and make an account, but that's something I haven't tried yet. You name your board and then assign a duration. If you create an account, you can save your board for up to a year. When you're happy, choose "Open your room".


Board naming tip: Make the name as long as you want. That way it's tougher for a random person to come across it. So if you are making it for your class read aloud, call it MrVillasanasfifthgradereadaloudboard. Or something else. 

Now that the board is open, students are free to comment. All they need to do is add their name and start posting. Simple, except you are probably wondering how to easily get your kids to the board. Well, here are some ideas: 

QR codes: since the board is a website, use a QR code generator (goo.gl, QR generator, QR stuff are some examples) and post it for students to access with their QR reader apps (QRafter is my favorite). Once they are there, have them save the board to their iPad home screen for easy access later.

Link Shortener: my second choice. Use your goo.gl account to shorten the link. Because you can sign in with your cpsk12.org Google account, your shortened links will be saved for later. Then you can have students type in the address in Safari and then add the link to their home screen. Added bonus: it automatically makes a QR code for you to use as well.

A couple of tips to make the experience more enjoyable for you:

  1. Keep the conversation simple. The younger the students, the simpler you need to be. For elementary students, I would have a single question or response for each board so it's easier for them to remember. You should probably have the question posted in the room as well. 
  2. They are going to play around. Give them a chance to get their fun out in a different setting, such as a community board where they can chat with their friends. 
  3. Create multiple boards for different purposes. It's easy to create and the kids can add all the boards to their devices. They can even make a folder on the iPad just for Today's Meet boards.
Again, Today's Meet is a simple application. You can print an archive of the board, but you can't guarantee that a student is using his or her real name without looking over their shoulders. If you want to get more in-depth with discussion board features, you can use Blackboard. However, if you are looking for simplicity and ease of use, Today's Meet is a great place to start.